


Introduction
A kitchen sink deals with a surprising amount of mess every day. Food crumbs, grease, coffee stains, soap residue, and dirty water can quickly make it look dull. Learning how to clean a kitchen sink properly can keep this busy area fresh without spending a lot of time or money.
I have found that the easiest approach is to clean the sink in small stages instead of trying to scrub everything at once. A quick rinse removes loose debris, a gentle cleaner handles grime, and a final rinse brings back the shine.
At Clean Home Craft, we focus on practical household methods that fit into real daily routines. You do not need a complicated collection of products to keep your kitchen sink looking clean.
How to Clean a Kitchen Sink Step by Step
Before starting, remove dishes, sponges, food scraps, and anything else sitting inside or around the sink. This gives you enough space to clean every surface properly.
Step 1: Remove Food and Loose Debris
Start by clearing the drain area. Pick up visible food pieces and throw them into the trash or compost where appropriate.
Next, rinse the basin with warm water. Crumbs often accumulate in corners, so pay attention to them.
Do not push large food particles down the drain. They can contribute to unpleasant odors or drainage problems.
Step 2: Wash Away Grease
After rinsing a sink, the sticky film left by grease makes the sink appear dirty.
Add a small amount of dish soap to a damp sponge or soft cloth. Work around the basin using circular motions.
Clean these areas carefully:
- The bottom of the sink
- Side walls
- Corners
- Around the drain
- Faucet base
- Handles
- Edges and seams
Rinse the loosened grease with warm water.
Step 3: Scrub Stubborn Marks
If you still see stains, use a small amount of baking soda with water to create a soft paste. Apply it to the marked area and gently rub with a non-abrasive sponge.
Avoid aggressive scrubbing on delicate finishes. A gentle cleaner and a little patience are usually better than using excessive force.
For stainless steel, follow the direction of the metal grain when scrubbing. It can help reduce the appearance of unwanted scratches.
Step 4: Clean the Faucet
The sink basin is not the only part that needs attention. Around the faucet, mineral deposits and water spots can accumulate.
Wipe the faucet with a damp microfiber cloth and a little dish soap. Then rinse and dry it.
Vinegar may help remove hard-water buildup from compatible surfaces. However, do not use acidic cleaners on surfaces that can be damaged by them, such as certain natural stones.
Step 5: Rinse Thoroughly
Once you finish scrubbing, rinse the entire sink with clean water.
Look around the drain, faucet base, and corners. Insufficiently removed cleaner residue can result in a cloudy appearance.
A thorough rinse also prevents leftover soap from collecting on the surface.
Step 6: Dry the Sink
Drying is a simple step that many people skip.
A microfiber cloth should be used to wipe the basin, faucet, and surrounding edges. Drying removes remaining water droplets and can reduce visible water spots.
If your sink regularly develops marks after cleaning, making drying part of your routine can make a noticeable difference.
Kitchen Sink Cleaning Methods Compared
Different cleaning situations call for slightly different approaches. Here is a simple comparison you can use when deciding what to do.
| Cleaning Problem | Suggested Method | Useful Item | Frequency |
| Food crumbs | Rinse and wipe | Soft sponge | Daily |
| Greasy surface | Dish soap and warm water | Sponge | Daily |
| Light stains | Baking soda paste | Soft cloth | Weekly |
| Water spots | Gentle surface cleaner | Microfiber cloth | As needed |
| Faucet buildup | Compatible descaling method | Soft cloth | Weekly |
| Unpleasant odor | Clean drain area | Baking soda or suitable cleaner | As needed |
| Dull appearance | Wash and dry thoroughly | Microfiber cloth | Weekly |
The key is to match the cleaning method to the problem. Stronger does not always mean better.
How to Keep Your Kitchen Sink Cleaner for Longer
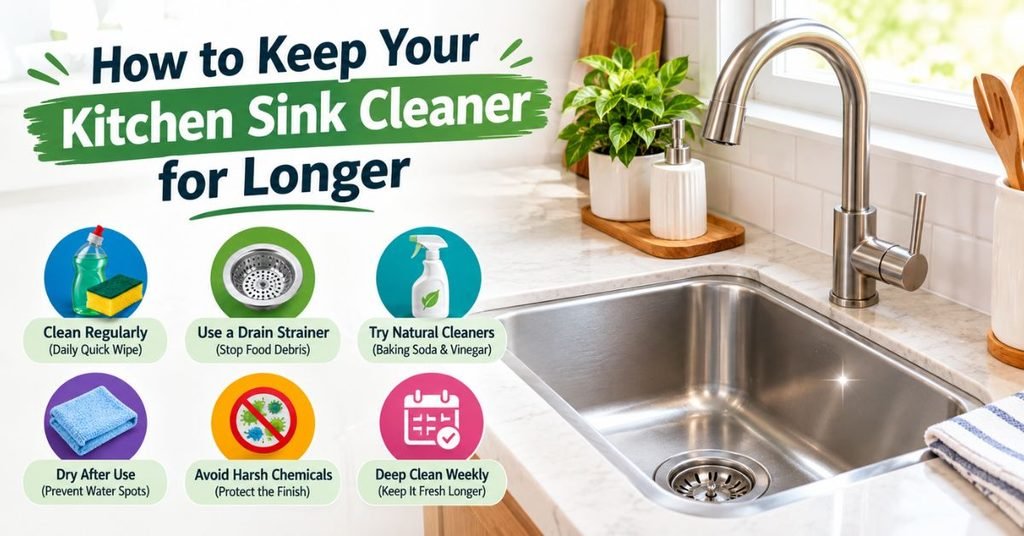
Once the sink is clean, a few small habits can prevent heavy buildup.
Rinse After Preparing Food
After chopping vegetables, preparing meat, or washing dishes, rinse away small particles instead of leaving them inside the basin.
This takes only a few seconds but prevents debris from drying onto the surface.
Do Not Leave Wet Sponges in the Sink
A constantly wet sponge can develop an unpleasant smell. After using it, rinse it well and place it somewhere where it can dry properly.
The same applies to wet cleaning cloths.
Wipe Around the Drain
The drain area can collect tiny food particles and greasy residue. Give it a quick wipe whenever you notice buildup.
This small habit is especially useful if several people use the kitchen throughout the day.
Dry the Faucet
Water droplets can leave mineral marks, particularly in areas with hard water. Wiping the faucet after use takes very little time.
At Clean Home Craft, we often recommend simple maintenance habits like this because they reduce the need for longer cleaning sessions later.
Natural Ingredients You Can Use Carefully
Many homeowners prefer everyday ingredients for light cleaning jobs. Baking soda and diluted vinegar are common choices, but they should not be treated as universal cleaners.
Baking soda can provide gentle scrubbing power. It works well for some light stains and residue when used carefully.
The acidity of vinegar may help with certain mineral deposits. You should avoid using vinegar on natural stone surfaces, such as marble or limestone, since acids can damage them.
The most important thing is not to mix vinegar with bleach or products containing bleach. Dangerous fumes can result.
When you are unsure about a sink’s material, check the manufacturer’s cleaning recommendations first.
Cleaning Different Sink Materials
Not every kitchen sink should be cleaned in exactly the same way.
Stainless Steel
The metal is durable, but it can be scratched by harsh abrasives. Use mild dish soap, a soft sponge, and a microfiber cloth.
For the best appearance, wipe in the direction of the grain rather than scrubbing randomly.
Porcelain
Porcelain sinks can show stains easily. Use gentle cleaning methods and avoid abrasive tools that could damage the finish.
Rinse thoroughly after cleaning.
Composite Sinks
Composite materials can have specific maintenance requirements. Check the manufacturer’s instructions before applying acidic cleaners, abrasive powders, or strong chemicals.
Natural Stone
Natural stone requires extra care. Avoid acidic household cleaners unless the manufacturer specifically says they are safe for that surface.
A pH-neutral cleaner is often a safer choice for stone surfaces.
Common Kitchen Sink Cleaning Mistakes
A few habits can make cleaning less effective or even damage the sink.
Using a Rough Scrubber
Steel wool and very abrasive pads may scratch certain surfaces. Choose a soft sponge or cloth whenever possible.
Leaving Cleaner on the Surface
Cleaning products should not simply sit on the sink. Follow the product instructions, then rinse when required.
Ignoring the Faucet Base
The area around the faucet can collect grime and mineral deposits. Include it in your regular routine.
Forgetting the Drain
A clean-looking basin can still have buildup around the drain. Wipe this area regularly and remove visible debris.
Mixing Cleaning Products
Never combine different cleaning chemicals unless the product directions specifically say they are compatible. In particular, never mix bleach with acids such as vinegar.
A Simple Weekly Kitchen Sink Routine
If you want a routine that is easy to remember, keep it short.
Daily:
- Remove food debris.
- Rinse the basin.
- Wipe visible grease.
- Dry the faucet and sink.
Once or twice a week:
- Wash the entire basin with dish soap.
- Clean the faucet base.
- Scrub appropriate areas gently.
- Check the drain for buildup.
- Rinse and dry everything.
This routine prevents small messes from turning into stubborn cleaning jobs.
Conclusion
Knowing how to clean a kitchen sink does not require an expensive collection of cleaning products. Start by removing food debris, wash away grease with dish soap and warm water, treat suitable stains gently, clean the faucet, rinse thoroughly, and finish by drying the entire area.
The biggest difference often comes from consistency. A quick daily rinse and wipe can prevent grime from becoming a bigger job later. Also, remember to consider your sink material before using baking soda, vinegar, abrasive products, or other cleaners.
For more practical home cleaning ideas, visit CleanHomeCraft.com and explore simple household tips designed for everyday life. A few minutes of regular care can keep your kitchen feeling fresher and easier to maintain.
A quick rinse and wipe can be done every day. A more detailed cleaning once or twice a week is usually enough for many households, although busy kitchens may need more frequent attention.
Baking soda can work as a gentle cleaner for some sink materials. However, test it carefully and avoid aggressive scrubbing, especially on finishes that scratch easily.
Vinegar can help with certain mineral deposits and water marks. However, it is not suitable for every sink material. Avoid vinegar on natural stone unless the manufacturer confirms that it is safe.
Start by removing food debris and cleaning the area around the drain. Rinse thoroughly and keep the sink dry between uses. If an odor persists, investigate the drain rather than simply covering the smell with fragrance.
Clean it with mild dish soap and warm water, rinse well, and dry it with a microfiber cloth. Following the direction of the stainless-steel grain can also help create a more polished appearance.

Muhammad Ahad — Passionate writer sharing informative, engaging, and easy-to-read articles across different topics. Focused on delivering valuable content that helps readers learn, explore, and stay inspired every day.