

Introduction
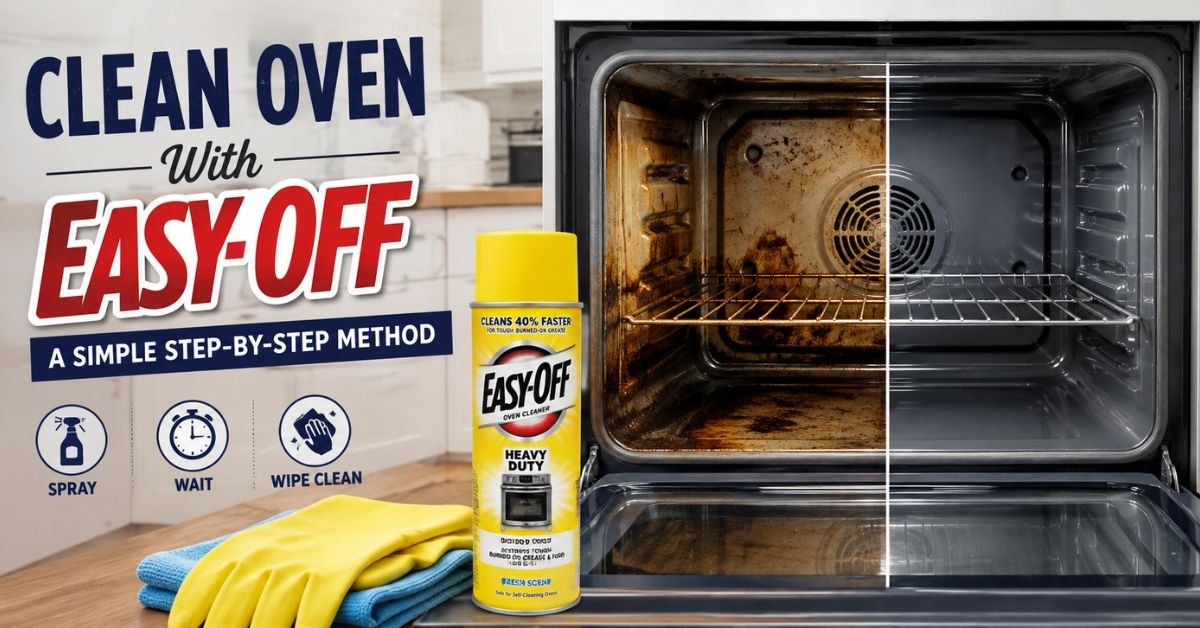
A greasy oven can turn a simple cooking session into a smoky, unpleasant mess. Burned food, baked-on oil, and dark spots often become harder to remove when they sit for weeks. I have found that using the right cleaner and giving it enough time to work makes the job much easier. If you want to clean oven with easy off, the process can be surprisingly straightforward when you prepare the oven properly.
Easy-Off is designed to loosen stubborn oven grease and baked-on residue. However, using it correctly matters. You need good ventilation, suitable protection, and enough time for the product to break down the grime.
At Clean Home Craft, we focus on practical cleaning methods that make everyday household jobs less stressful. This oven-cleaning method is especially useful when your oven needs a deeper clean without spending hours scrubbing.
What You Need Before Cleaning
Gather everything before opening the cleaner. Having your supplies ready prevents interruptions while you work.
You will need:
- Easy-Off oven cleaner
- Rubber or chemical-resistant gloves
- Old towels or newspapers
- A damp microfiber cloth
- A non-scratch sponge
- Warm water
- A small bucket
- Old toothbrush or soft cleaning brush
- Trash bag for heavily soiled disposable materials
You may also want safety glasses if you are sensitive to cleaning sprays.
Before starting, read the directions printed on your specific Easy-Off product. Different formulas can have different instructions, especially regarding whether the oven should be warm or completely cold.
How to Clean Oven With Easy-Off Safely
Safety should come before speed. Oven cleaners contain powerful ingredients that can irritate your skin, eyes, and breathing passages.
Prepare the Room
Open windows and doors where possible. Turn on your kitchen exhaust fan to improve airflow.
Keep children and pets away from the kitchen while you are working. Also, remove food, cookware, baking trays, and other loose objects from the oven.
If your oven has a self-cleaning function, check the manufacturer’s instructions before using any chemical oven cleaner. Some ovens have special surfaces or components that require different care.
Protect the Floor
Place old towels, newspapers, or another suitable protective covering beneath the oven door. Spray can sometimes drip, especially when you are treating the upper walls.
Protecting the floor takes only a minute but can save you from cleaning another mess later.
Remove Loose Debris
Do not immediately cover a thick layer of crumbs with oven cleaner.
Instead, remove loose pieces of burned food by hand or with a soft brush. A plastic scraper can help with stubborn chunks, provided it is safe for your oven’s surface.
The cleaner can then concentrate on the greasy layer underneath.
Applying Easy-Off Correctly
The application step is where patience makes a major difference.
Make sure you follow the label instructions for your particular Easy-Off formula. Some versions are intended for cold ovens, while others have different application requirements.
Spray the cleaner over the dirty areas according to the product directions. Avoid spraying electrical heating elements, exposed wiring, door seals, or areas specifically excluded by the manufacturer.
Flooding the oven is not necessary. A consistent coating over greasy surfaces is usually more useful than excessive spraying.
Let the Cleaner Work
One of the biggest mistakes is wiping the product away too soon.
Easy-Off needs time to soften baked-on grease. Follow the recommended waiting period printed on the container. During this time, keep the oven closed if the product directions call for it and maintain good ventilation.
For extremely dirty areas, avoid the temptation to add extra cleaner simply because the grime looks stubborn. Proper dwell time is generally more helpful than using a large amount of product.
A Simple Oven Cleaning Comparison
| Cleaning Stage | What to Do | Main Purpose |
| Preparation | Remove racks and loose debris | Makes cleaning easier |
| Protection | Cover the floor and wear gloves | Reduces mess and exposure |
| Application | Apply Easy-Off as directed | Loosens baked-on grime |
| Waiting | Follow the label’s recommended time | Allows cleaner to work |
| Wiping | Use damp cloths and a sponge | Removes softened residue |
| Rinsing | Wipe repeatedly with clean water | Removes cleaner residue |
| Final check | Inspect corners and glass | Catches leftover grime |
Wiping Away the Grease
Once the recommended waiting time has passed, start removing the loosened residue.
To clean, use a damp microfiber cloth or non-scratch sponge. Work from the top and sides toward the bottom so dirty liquid does not spread across surfaces you already cleaned.
Rinse your cloth frequently in clean water. Otherwise, you may simply move greasy residue from one part of the oven to another.
For thick patches, gently repeat the wiping process instead of immediately reaching for an abrasive scrubber.
Handling Stubborn Spots
Some areas may still have dark, baked-on deposits.
Use a soft brush or suitable non-scratch tool to loosen them. Apply gentle pressure rather than aggressively scraping the surface.
If a particular spot refuses to move, another treatment may be safer than excessive force. Follow the Easy-Off label before deciding whether another application is appropriate.
Remember that oven interiors can contain surfaces that scratch or discolor when treated too aggressively.
Cleaning the Oven Door and Glass
The oven door often collects grease because steam and food splashes hit the glass during cooking.
Apply cleaner to a cloth or follow the product instructions specifically for the door. Do not assume every oven-glass surface should be treated exactly like the interior cavity.
Wipe the glass with a damp microfiber cloth and rinse it several times with clean water.
For stubborn marks, repeat gentle wiping rather than using rough steel wool. Scratches on glass can make the door look permanently dirty even after the grease is gone.
Cleaning the Oven Racks
Remove the racks before treating the oven whenever the manufacturer’s instructions allow it.
Place them in a suitable tub or another protected area. You can wash them with warm water and dish soap if they only have light grease.
For heavier buildup, use a method recommended for your specific rack material and the Easy-Off product instructions. After cleaning, rinse the racks thoroughly and dry them completely.
Before putting them back, check that they slide smoothly into their original positions.
Final Rinse Is Essential
After the grime has been removed, do not stop at the first clean-looking wipe.
Use fresh water and a clean cloth to wipe the interior several times. Pay special attention to corners, the bottom surface, and areas around the door.
The goal is to remove remaining cleaning-product residue.
Change your rinse water whenever it becomes dirty. A final wipe with a fresh damp cloth helps leave the oven ready for normal use.
Let Everything Dry
Leave the oven door open for a while if your manufacturer’s instructions allow it. This helps remaining moisture evaporate.
Before cooking again, make sure there is no visible cleaner residue, unusual chemical smell, or wet area inside the oven.
If you notice anything concerning, continue rinsing and follow the product and oven manufacturer’s instructions.
Common Mistakes to Avoid
Even a strong oven cleaner cannot compensate for poor technique.
Avoid these common mistakes:
- Spraying without checking the product label
- Cleaning without adequate ventilation
- Using bare hands
- Applying cleaner to prohibited oven components
- Scrubbing aggressively with abrasive materials
- Leaving chemical residue behind
- Using too much product
- Ignoring the manufacturer’s oven-care instructions
- Cleaning while children or pets are nearby
A slower, controlled approach usually produces a cleaner result with less mess.
A Practical Tip From Clean Home Craft
If you regularly cook foods that splatter oil or sauces, do not wait until the oven becomes heavily coated.
Instead, add a quick wipe to your normal kitchen routine after the oven has cooled completely. Removing fresh splashes is much easier than attacking months of baked-on grease.
For more household cleaning ideas, Clean Home Craft recommends focusing on small maintenance habits between deep-cleaning sessions. clean oven with easy off attention can sometimes prevent a much longer cleaning job later.
How Often Should You Deep Clean an Oven?
There is no universal schedule because cooking habits vary.
A household that frequently roasts meat, bakes casseroles, or cooks greasy foods may need deeper cleaning more often. Someone who rarely uses the oven may need it less frequently.
Watch for these signs:
- Strong burnt odors during cooking
- Visible layers of grease
- Smoke caused by old food residue
- Large patches of baked-on food
- Dirty oven glass
- Crumbs accumulating on the oven floor
Cleaning before the buildup becomes extreme usually makes the next session much easier.
Conclusion
Learning how to clean oven with easy off can make a difficult kitchen chore much more manageable. The key is not simply spraying the product and scrubbing hard. Instead, prepare the area, protect yourself, follow the product directions, allow the cleaner to work, and rinse the oven thoroughly afterward.
Start by removing loose debris and protecting the surrounding floor. Apply Easy-Off according to the label, wait for the recommended time, and then wipe away the softened grease with suitable cleaning tools. Finally, rinse the interior carefully and make sure everything is dry before using the oven again.
For more practical kitchen and home cleaning ideas, visit CleanHomeCraft.com and explore Clean Home Craft for simple methods that help keep everyday cleaning under control.
Not necessarily. Oven materials and manufacturer recommendations vary. Always check your oven manual and the specific Easy-Off product label before applying it.
That depends on the Easy-Off formula. Some products are designed for cold ovens, while others have different instructions. Follow the directions on your exact product.
Use the waiting period specified on the product label. Do not assume that leaving it for several hours will produce a better result.
Yes, thoroughly wiping the oven with clean water is an important part of the process. Repeat the rinsing step until you are confident that cleaning-product residue has been removed.
Check the product label and your oven manufacturer’s instructions first. Oven doors can contain different materials, so treatment recommendations may vary.

Muhammad Ahad — Passionate writer sharing informative, engaging, and easy-to-read articles across different topics. Focused on delivering valuable content that helps readers learn, explore, and stay inspired every day.
1 thought on “Clean Oven With Easy-Off: A Simple Step-by-Step Method”